Ok to put matters right here are one or two things that I've made over the last few months:
WELCOME TO MARSHALL
Marshall was my first attempt at making a paper mache sculpture. The minute my partner saw him he acquired the name ... don't ask me why.
Marshall's head was made of clay and his legs were a driftwood twig that I found whilst beach combing on holiday last summer and the base he is standing on is another piece of driftwood. The feathers in his topper are courtesy of my bantams. Both the topper and the scarf are covered in black flock to give a furry texture.
This is a close up of the driftwood twigs.... a little bit uneven but I rather liked the look of that. When I found the driftwood and carried it home my partner asked what on earth I was going to do with it. Then I had no idea but when I decided to make Marshall I knew I'd use the driftwood for his legs so my partner would recognise the driftwood we'd found together on our walk!
As you can see Marshall is a tad portly........
I used self adhesive half pearls on his white shirt and self adhesive black facets on his waistcoat and
red coat. His coat tails and scarf were wired up to try to give the feel of motion. Originally Marshall
was to have a cane or umbrella in his hands but I ran out of time as this was a Xmas make... in our home we always make five presents for each other to be opened on New Year's day. Here is another of my other makes.....
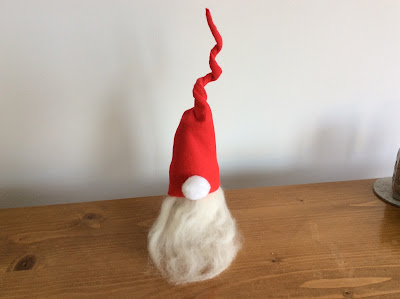
He's a Scandinavian gnome but with a secret.......
 This is what he's hiding beneath his beard, a bottle of homemade cranberry and lime infused gin.The colours were absolutely gorgeous and there was enough over to make another bottle which we took over to friends.
My other makes included a bug house for outside and another reindeer to join our ever growing Xmas herd in the garden.
Ok, what else have I been doing? Well as we seem to be on the theme of Xmas, here are a few of my Xmas cards.
This very simple card accompanied my reindeer Xmas make. The antlers were hand drawn and coloured/shaded using TH markers and then covered in Glossy Accents, the eyes were self adhesive bug eyes, a red pompom from my stash for the nose..... stamped 'Merry Christmas' and mounted with dimensional pads on to a red card base......... Bob's your uncle. Couldn't have been easier.
These cards took a little longer but were amazing fun to make. I swath design on Pinterest and fell in love with it..... the Stampendous embossing powder did the trick for me.
 For this card I used some designer paper from my stash as one of the layers. But for the other two I used cardstock
 Here's a close up of the embossing.... tiny flecks of gold amongst the white. I used Fluff It to give a little more snow effect on the trees.
I'm sure you'll recognise this TH die..... it disappeared from my wish list to materialise in my stocking last Xmas (YEAAAAA!!!!). With three male birthdays following in quick succession after Xmas it was the perfect opportunity for me to play.
Obviously these two are very much the same. Just the odd touch to differentiate.... spot the differences.
But with this card I had more time to play and had a ball stitching, shading my edges and stamping with DI, layering and scrunching the paper to get that distressed look and finally out came the Glossy Accents to add a touch of gloss to my gent......love this die.
Oh, and in case you're wondering, those are hare ears at the corner of the picture. It's a brass wall hanger for coats and jackets etc. But you knew that, right?
Bye for now everyone and thanks for stopping by.
Carol xx


No comments:
Post a Comment