Translate

Showing posts with label Tags. Show all posts

Sunday, 17 June 2018

Tag Journal Page

Hi everyone,

sorry for not posting for a wee while but I've been in the thick of it making wedding stationery to a tight deadline. After that I headed off to the sun for a well earned holiday.

As much as I always enjoy making wedding stationery I really missed  'playtime'.  So to compensate I snook a few envelopes into my suitcase just in case I had time to doodle snail mail (envelope art) whilst I was away.... which of course I did. A girl can only have so much sun.

Now I'm back, and with post holiday chores out of the way, I had time today to finish of a project that I started before I got embroiled in the wedding stationery. It's a journal page with a tag. You'll see what I mean........


To give you an idea of how I put the page together and the products I used, here's a run through of the process:

The background layer was an old practice piece that had been squirrelled away after testing out a new stamp (scribbled circle from Las Vegastamps). I stamped on a previously used scarp of watercolor card using Ranger Distress Oxide Ink (peeled paint).  I thought the practice piece would be perfect for what I had in mind and to add a little more interest to the background I decided to added a row of machine stitching around the edge.  I  later inked the edges and over the stitches using Ranger Distress Ink (peeled paint) and a blending tool.


The next layer is a tag and for this I used a Ranger size 8 manilla tag. I added large random circles using crackle paste through a handmade stencil and glued on the remnants from my hole punch  with a little Ranger Matt Medium. When the glue and crackle paste were dry, the whole thing got a coat of Claudine Hellmuth Studio gesso (white).


Using Windsor & Newton water colour paint (sap green)  I created some dripped from the top of the tag, spritzing with water to aid the flow..... I just love how the paint flowed around the smaller circles but enhanced the crazing in the larger circles as it forced it's way through the cracks and crevices in the dry crackle paste. 


The gesso made the paint look almost chalky and muted the colour which wasn't what I wanted really. To help the smaller circles stand out I decided to paint them using the same sap green watercolour paint.

I cut a piece of vellum to the same size as the tag and machine stitched the two together. The misty look of the tag through the vellum was just what I wanted.  An off cut of paper from my stash  found it's way onto the bottom of the vellum, as did Ranger Remnant Rubs (numbers) in various places.....


Here.......


and here around and over a scrap of numeral ephemera ......


and also here on top  of another off cut of paper .....

Another tiny piece of paper was glued with matt medium on the left hand side, then layered with a small square of acetate and finally with a tiny cog. I used Glossy Accents to secure all three layers.
A few more cogs were used here and there, again secured in place with Glossy Accents. I had intended to paint the cogs but as I was deciding where to put them I rather liked their natural silver, so left them unmolested.


I secured a decorative brad from my stash through the hole at the top of the tag and used double sided tape to secure the tag to my background. The decorative brad has a thin silver band around the image so it ties in well with the au naturel cogs.


For once I didn't back my page with black card but I did add a tiny date tag  and secured it to the top right hand corner with a mini brad.

I rather like how this page turned out. What I like most, apart from the colour (sap green Mmmmm!!) is that the texture is hinted at through the vellum.

Thank you for letting me share my page with you.

Happy crafting,


Carol, xx

Wednesday, 16 May 2018

Pockets & Bit 'n' Bobs

Hi, 

I thought I'd share what I've been doing today..... 


Well for starters I've been creating some little pockets and tuck spots for my ongoing junk journals and to do this I've been altering glassine bags. 

I know it is really easy to make your own glassine bags/envelopes but the ones I worked on today were purchased from The Pumpkin Paper Co. Size wise they are 6.5cm x 9cm and portrait orientation i.e the opening flap is at the top rather than at the side. They're very robust and I find they take to being daubed with ink, stain, gesso and tea/coffee really well. However, when it comes to glue I tend to use a viscous one like Ranger Matt Medium or Golden Heavy Gel, so it doesn't warp the glassine too much.

Here are a couple of close up of my altered pieces......


I printed and resized a couple of images that I found on the Internet and then basically collaged and layered them with snippets of lace from my stash, adding threads, tissue paper, vellum, dryer sheets, charms, tiny tags and vintage mother of pearl buttons as the mood took me. 


With some I applied a layer of white gesso first, then when dry, stamped over the top using a the script stamp from a Stampers Anonymous stamp set (Entomology CMS328) using Distress Ink (vintage photo) to form a background. On others I stamped additional images over the top from another Stampers Anonymous stamp Set (tiny things CMS164)


I also added scraps of coffee stained paper and hessian to my layering. Mind you I have to admit that I really struggle with collaging and it doesn't come easily to me.


And finally here is my last pocket and the tag I made for inside, both using the same mushroom image......


In addition to the glassine bags I decided to alter a C6 size brown envelope. Firstly I covered the envelope with an old, yellowing book page from an ancient copy of Brideshead Revisited (great book) and then basically I went through the same process as for the glassine envelopes, collaging to my hearts content again. This time I used some Ranger washi tape (Butterflies or perhaps it's called Botanical, sorry not sure) and some ruler washi tape from my stash.


The verdict is still out for me on this envelope.... I think what is putting me off is the 15 dollar stamp in Versamark ink (black) on the vellum. It seems too prominent and in retrospect perhaps I should have gone for brown.  I worked on the envelope sealed but cut a slither off down the right-hand side to create the opening for the pocket..... If I decide to use the envelope I'll cut a semi circle into one layer on the RH side, so that it's easier to access as a pocket.

The other thing I made today was an origami box to hold wild flower seeds....


 It measures 3" x 2.5" and is held flat with a belly band which I decorated with snippets of Edith Holden paper, a heart made out of layers of old book paper, a lace daisy and a mother of pearl button. I used crotchet thread to sew through all the layers to secure them in place on the belly band. A couple of tiny tags were glued under the edge of the daisy with matt gel.


This is what it looks like when the belly band is slipped off and inside .....


......A tiny packet of wild flower seeds. I stitched two layers of thick vellum together using my sewing machine and secured the ends with tiny hearts cut from Prima Marketing cardstock (Archivist). The edges were inked wit Distress Ink (vintage photo). The planting instructions from the original seek packet was trimmed to size and used to line the bottom of the origami box.


On the reverse of the box is an image of wild flowers that I found on the Internet.  Because this box is relatively flat I'm going to use it as an insert for the botanical junk journal I'm currently making. It's so cute and I'm delighted at how it turned out..... I'll certainly be making more.

That wasn't the last of my labours today. I also made a small book which will be another insert into one of my junk journals. I'll be posting on that tomorrow and sharing some photographs, so I hope you'll join me.

Happy crafting....

Carol. xx

Saturday, 5 May 2018

Grungy Floral - Tag

Happy Bank Holiday everyone,

just a very quick post today to show you what became of the test piece for the Botanical Merchandise tag that I blogged about yesterday. This was that tag........


and this is what became of the test piece......


Pretty much identical, certainly in terms of the background. The only difference is that I used Ranger Texture Paste (opaque crackle) and the whole background is riven with cracks and crevices and a lot more muted in colour. Other than that the making process was exactly the same as for my Botanical Merchandise tag. Check out my earlier post if you are interested in a walk through of how I put that tag together.

As I had a small piece of the Ranger Collage Paper(botanicals) left over I stayed with the botanical theme. I fussy cut the poppy  this time and glued it onto vellum using Ranger Multi Medium (mat). It was coloured using Distress Ink (vintage photo) and adhered to one side of the tag with Golden Heavy Gel (matt). 

To add a little more interest I layered a couple of Ranger Cogs to the centre and filled the centre of these with tiny seed beads which in turn were held in place with Glossy Accents. I also scattered some of the beads over Distress Crackle Paint (rock candy) which I touched randomly over the poppy petals.

The Glossy Accents wasn't quite dry in the photo and is showing opaque.
It is clear when dry and will show the trapped seed beads. 

I used various pieces of Ranger Ephemera (botanicals) around the poppy together with an old train ticket from my stash, a Ranger Mini Plaquette,  a Ranger Tag Label (without the metal casement) and Ranger Film Strip Ribbon.

You can see the lovely cracks and crackles from
the texture paste I used on the background.

I also used another couple of pieces of ephemera from my stash, to one side and again at the top of the tag. Various Ranger Cogs & Gears and Prima Mechanicals (mini hardware) were attached too.


I used an old jewellery box handle instead of a ribbon at the top, but coloured it first using a Sharpie (black). The jump-ring on my tiny date tag fitted snugly between the screw and the font piece of the handle so it's held firmly in place.


I've had a couple of acetate tabs in my stash for an age now and decided to use one to lap over the piece of ephemera I used on the top of the tag. I held it in place with a touch of Glossy Accents and  a couple or three mini staples for interest. I don't have a Ranger tiny attacher but I do have a tiny chicken (!) 

Isn't she cute and she does a perfect job.
Thanks so much for popping by. Enjoy your Bank Holiday and .....

Happy crafting

Carol.  xx 

Friday, 4 May 2018

Botanical Merchandise - Tag

Hi,

France Papillon is doing a thuuung on her blog: A ALAD/ASAW challenge which simply equates to a layer a day/ a spread a week (Challenge link)  

When France proposed the challenge at the start of the year, I didn't think it would work for me. Being an impatient finisher completer I like to get stuck into my projects and revel in them until they are complete. But having said that, it is actually working very well and gives me the chance to play along side concentrating  on other priority projects, like my nieces wedding stationery! The only draw back is that I seem to have several 'play projects' on the go at once these days!

Never mind, it is giving me infinite pleasure. I walk through my craft room to get to my utility room and in doing so, I walk past my play projects sitting on the desk and that in turn gets me pondering on the next step in their creative process. Mind you , I have to admit that I do sometimes get distracted and find that loading or unloading the washing machine has been delayed by the odd 30 mins or so.... Oops.  But, like most things, this challenge thing is a work in progress.

Sooooo todays tag is one of those play projects that has been ongoing for a few days.  I've called it Botanical Merchandise and here it is.


I started off with a Ranger size 8 Mixed Media tag (heavy stock).  and using Ranger Distress Stain (vintage photo) and Stampers Anonymous Mini Layering Stencil (set 33 - circles) I created random circles, using both the negative and positive of the stencil. Then I cut various pieces from the Tim Holtz Collage Paper (botanicals) and glued them to my tag using Ranger Multi Medium (matt).


Using Ranger Distress Oxide Ink (bundled sage) and the text stamp from the Stampers Anonymous Entomology stamp set (CMS328), I set too randomly stamping script across the tag.


Picking out the bird and the bee stamps from the Stampers Anonymous Tiny Things stamp set (CMS164) I stamped these in Archival Ink (potting soil).


To fill in some of the blank spaces and to accentuate the circles already on the tag, I went back to the circles mini layering stencil and blended a Ranger Distress Crayon (hickory smoke) through the stencil using my finger. 


To frame the tag I used a mix of Distress Ink (vintage photo, ground expresso) around the edges. 


I also added an ephemera label to one side and sewed all round the edges with my sewing machine.


Then I went a bit mad with 'hardware'. Firstly I grunge up a Ranger Numeral (the number 2) with a Sharpie (brown, black),  Ranger Distress Crackle Paint (rock candy) and Ranger Multi Medium (matt) which I secured with brads over a strip of Ranger Film Strip Ribbon, also secured with brads but this time the Prima Mechanicals (mini hardware). I put another two of these brads into each bottom corner and a smaller sniper of the film strip above the ephemera label.

I chose a wee small bird image for the centre of my circular Ranger File Tab, ageing it with Distress Ink (vintage photo) before adhering the resin self adhesive cover in place. A small silver charm from my stash was similarly coloured and adhered on top with Glossy Accents. 


The letter N was my choice for my Ranger Type Charm which I glued to a garment tag and looped through a jump-ring along with a little silver leaf charm from my stash and my usual date tag. I attached the jump-ring through my ribbon at the top of the tag. I took the easy option and chose complimentary ribbon from my stash.... et voila. 


This tag will sit out in my craft room until the end of the month along with my other makes for the month. The jury is still out on  the numeral though. I'm comfortable that it ties in with the overall theme of the tag BUT it feels a wee bit too grungy for me... it looks like something I've rescued from the fire! 


Thanks so much for taking time to read my post. I really do appreciate it and if you'd like to leave a comment (positive criticism is always welcome) I'd be pleased to hear from you.


Happy crafting


Carol. xx


Thursday, 12 April 2018

Kindness can Change the World - Tag & Journal Page

Hi everyone,

something a little different today. I take part in an heART Swap every few months and this was one I did recently. The theme was kindness so I decided to create a postcard using the Tim Holtz's world Die by Sizzix, Distress Oxides and Stampendous Fran.tage embossing powders and this is the result......


As it was a while ago when I made the postcard I can't recall what  inky oxide deliciousness I used (sorry). But I suspect there's Wild Honey, Walnut Stain and Spiced Marmalade in the background, Iced Spruce for some of the landmass and Faded Jeans and/or Broken China with Walnut Stain and/or Frayed Burlap for the oceans. These were the only oxides I had then so it will  have been a combination of one or other of those colours.

To pick up some of the lovely warm orange hues from the background, I decided on Aged Gold (an opaque embossing powder) to create similar warmth elsewhere on the card. To do this I randomly touched a Versamark ink pad to various places on the die cut, added the embossing powder and heat set it with a heat tool.

The range of embossing powder I used was Stampendous Fran.tage embossing powders which comes as a set of five in a kit.  They are all really lovely to use.  The colours in the set are: Aged Silver (opaque), Shabby Blue (opaque), Shabby Pink (pastel), Shabby White (opaque) and the Aged Gold, which I used in this project.

I doodled a freehand border and the sentiment using a Micro pen (black 01). The sentiment, 

            "Never deny that a simple act of kindness, 
             however small, can  help to change the world"

was one I made up. I wrote it freehand trying to follow the curvature of the world.

As I had an extra die cut world left over I decided to make a tag and practise a little more using the same Distress Oxide combo. 


As you can see the tag is very similar to the postcard but on the tag I limited myself to just the Distress Oxides. My sentiment was computer generated this time but made a little shorted to fit the tag. Again, a touch of random doodling around the edge and also the sentiment boxes.

Although the picture doesn't show it, I did make my usual tiny date tag which I attached to white seam binding dyed with DO (Faded Jeans) to match the background.

I really do find the chalky finish of Distress Oxides very appealing and satisfying to work with. Whatever the colour combination they all blend gorgeously together and work equally well on their own or mixed with Distress Inks.... Well done Ranger.

As ever, thank you so much for stopping by.

Happy Crafting

 Carol. xx

Wednesday, 11 April 2018

Calm in the Storm - Tag

Hi Everyone,

this is another rainy day tag from late January....


The top layer was a scrap of card that had been lying around on my desk from an earlier project.  Originally it had been a test piece   but I liked it too much to consign it to the bin when that project was finished and it had been floating around ever since. I decided to make use of it by layering it onto a tag.

Using 300 gsm white card, cut to the size of a Ranger #8 tag, I smooched it with Ranger Distress Oxide Ink (Hickory Smoke) and then dripped Windsor & Newton Cotman Watercolour Paint (indigo) down it, to create my background.

Next, using Pebeo Mirror Effect Gilding Leaves I added random touches diagonally across both the background and the top layer.


My label was computer generated and edged with Hickory Smoke before being backed onto black card and layered onto a piece of gauge, which was also coloured using Hickory Smoke.

Finally to add a pop of colour, I added one of my tiny red handmade hearts, backed my tag with black card and added my tiny date tag to ribbon from my stash.

I loved how the well the indigo worked with the chalkiness of the Hickory Smoke and the effect the Pebeo gave splashing diagonally across the tag. 

Thanks for stopping by and hope you'll do so again.

Happy crafting...

Carol. xx 

Monday, 9 April 2018

Heart - Tag

Hi Everyone,

I'm still playing catch up sharing some of my tags from earlier this year.  This lovely little tag was a quick hit one rainy afternoon in late January.


Using Veerle's ( A Coloured Mind Blog ) 'go to' technique yet again, I coloured my background very lightly with Windsor & Newton Cotman watercolour paints (Sap Green & Indigo).

To create texture to the background, I added Sweet Poppy Pearlescent Stencil Paste through the Crafters Companion Mini Tie Dyed stencil.


When dry I activated Cosmic Shimmer Iridescent water colour paints (Golden Aqua, Golden Malachite) with a little water and let it flow and track down the paste and puddle to one side.


A small piece of torn Mulberry Paper with a tiny heart formed my focal point.  

I've mentioned these little hearts in previous posts: they're hand made, coloured using Stamping Up markers and gazed with Glossy Accents or sometimes Ranger Distress Crackle Paint (Rock Candy).  This one was slightly different as I used Ranger Collage Medium (crazing) to create the very fine crazing on top.

The ribbon was from my stash.

Thanks for stopping by and happy crafting


Carol. xx 

Sunday, 8 April 2018

Splatters -Tags

Hi everyone,

I've mentioned a couple of Visible Image stamps recently and today I'm going to mention another, the Ink Splats stamp set.


Splatters are like marmite, you either love them or hate them.  I happen to be a bit of a soft touch when it comes to spatters. That being said it took me ages to find the right stamp set to add to my collection... well, that was until I saw this one by Visible Image.  It's gives the perfect array of spatters or at least it does for me. There are five stamps in the set so you have plenty to choose  from. 

Here are a couple of tags I made using this set:


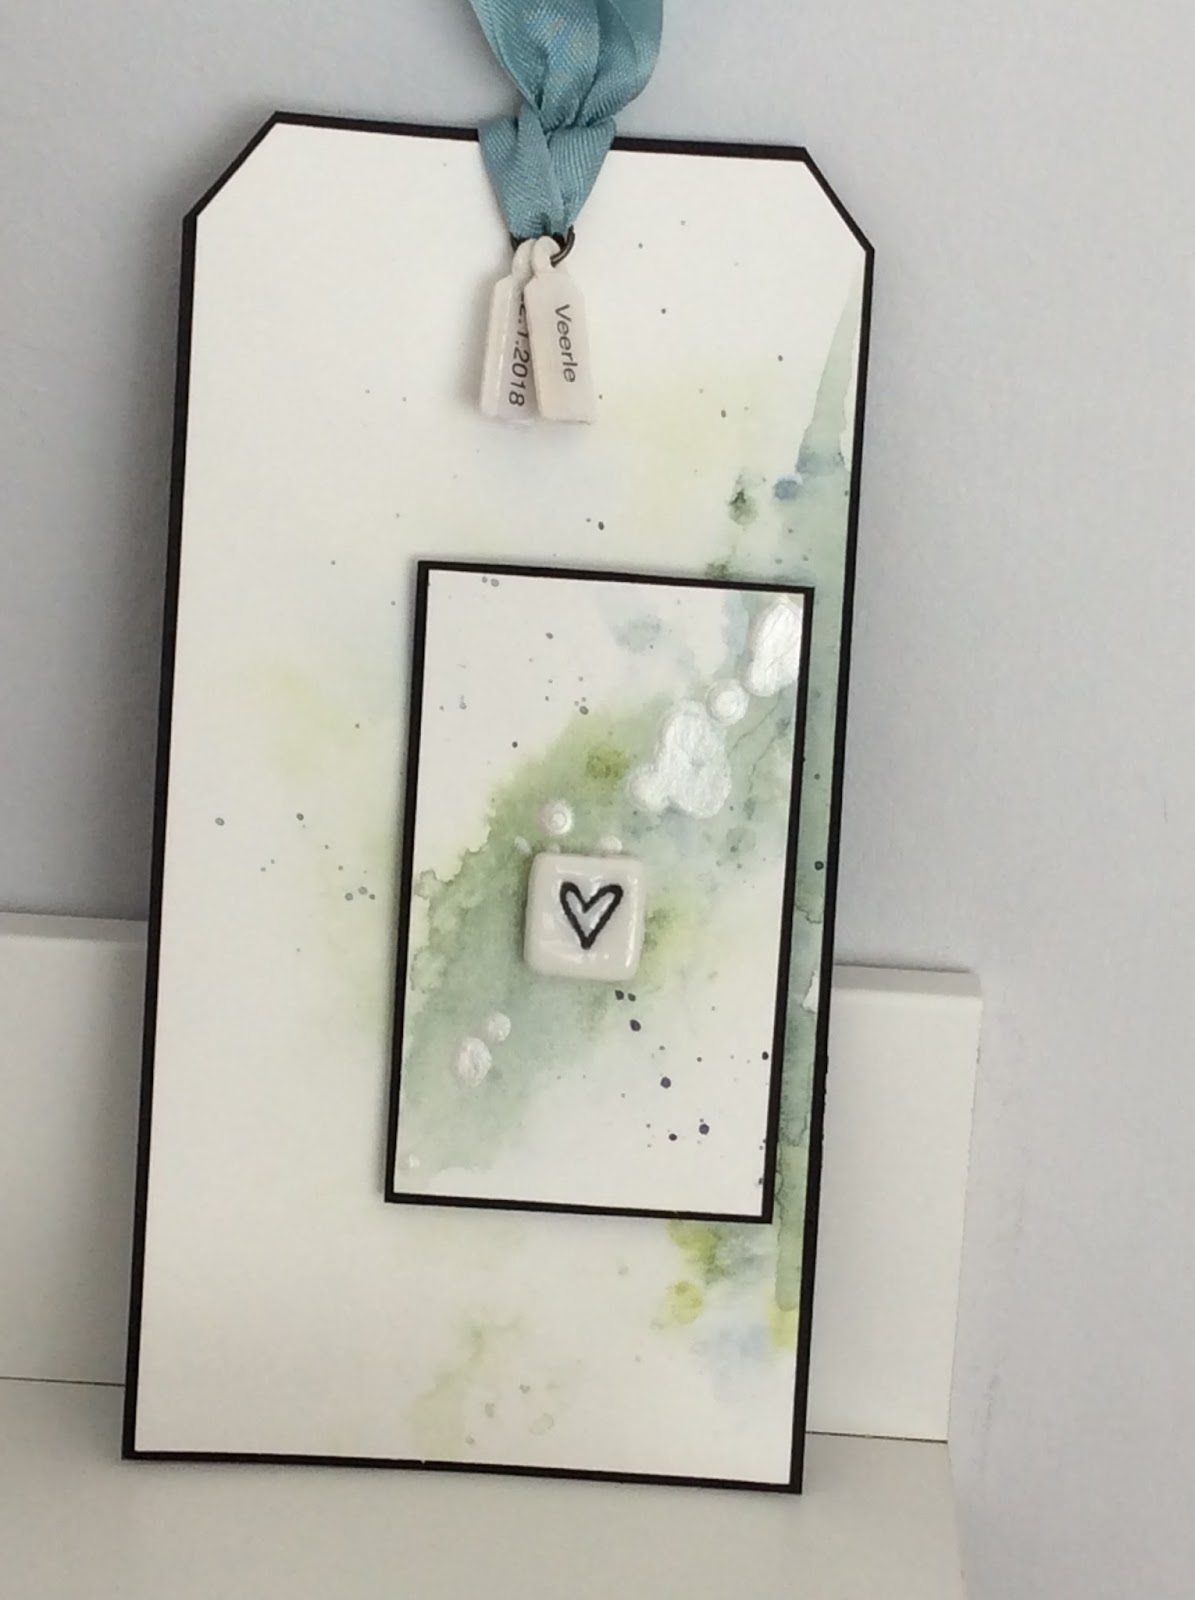
Both used Veerle Moreels' 'go to' technique for the backgrounds (A Coloured Mind blog).  For my paint I choose Windsor & Newton Cotman water colour paints (Sap Green, Indigo Blue).

On this tag...


I layered a small piece of card onto black card before mounting it onto dimensional foam pad and attaching it to my tag.  The splatters were added to the top layer by using both Sweet Poppy Pearlescent Stencil Paste through the Ranger splatters stencil, as well as being stamped using the Visible Image Ink Splatters stamp.

A tiny ceramic heart tile was added for focus using Glossy Accents.

On my second tag the spatters are more extensive.....


Again I used Sweet Poppy Pearlescent Stencil Paste through the Rangers Splatters stencil to create my spatters and to give some texture to the background.  To added a little more depth, I went round each splatter with a charcoal pencil, gently blending it out with a stubby. 


On top on of the main splatter I added a little piece of torn Mulberry Paper, a circle of green wire from my stash and a little red heart, coloured using Stamping Up markers and glazed with Glossy Accents.

Both tags were backed with black card and a tiny date tag added to the ribbon on each with a jump ring.  To remind myself that Veerle had provided the inspiration for my tags I added another tiny tag to each jump ring.

I really enjoy working with these two Newton & Windsor watercolours, they blend and compliment each other so well.  I also love how this pearlescent stencil paste gives a faint shimmer and texture to my projects, without being too prominent and leaves the overall look soft.

Thanks for letting me share my post with you today.

Happy crafting.

Carol. xx