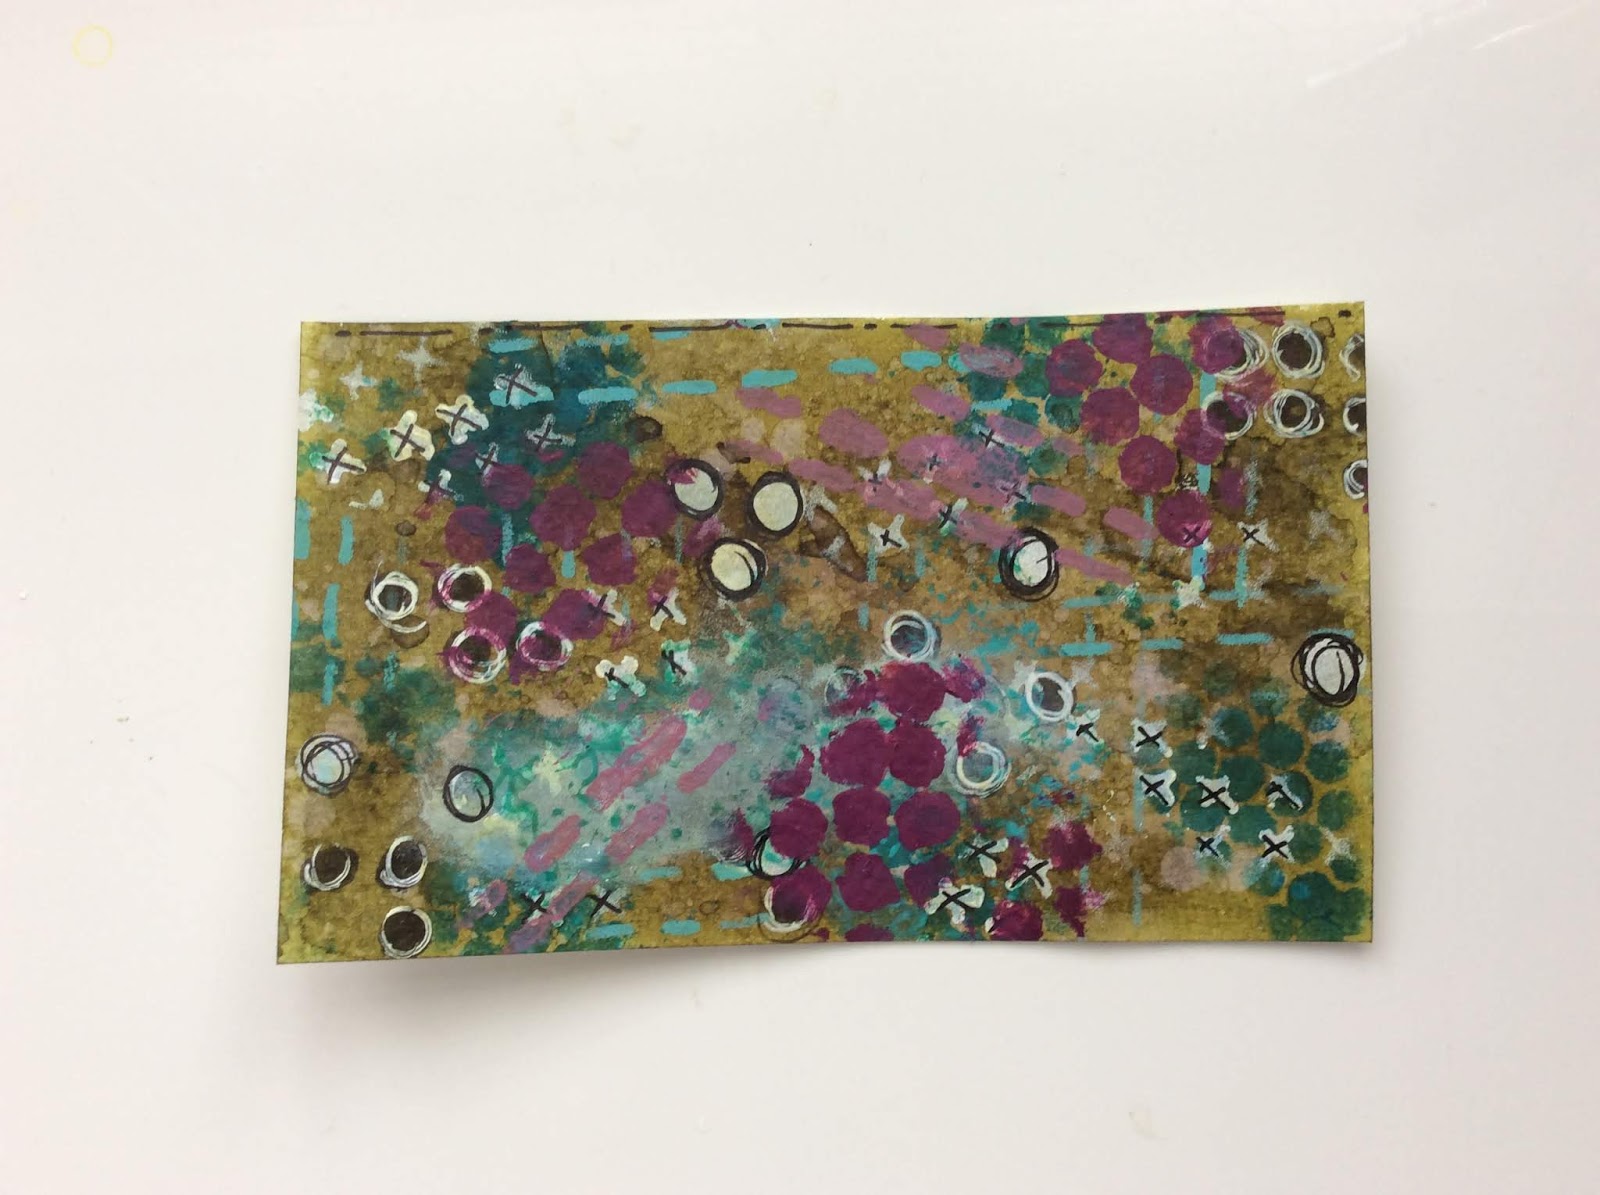
Morning everyone,
a very quick post today to show you another ICAD that I made recently. Sorry there aren't any step by step pictures to share for this one but I thought I'd share it as it was a new technique for me.
Ok, here's the ICAD....
First of all the image, the snow house was embossed using white EP. Then various coloured Distress inks and oxides were smeared on a craft mat and very gently spritzed with water until the ink activates by forming TINY droplets. Less water is added to the ink than you would for the wrinkle free technique.
Now take your card, curve it slightly and very gently dab the curved surface to the droplets. Tiny spots of ink should only adhere to the small curved area of card. Keep touching the card to the droplets until you have the desired look, slightly altering the curve in the card to build up the tiny ink spots on the surface. The desired look is to fill your card with tiny, tiny spots of coloured ink. The ink will touch the embossed image but the EP will act as a resist.
I think the three colours of Distress inks I used were Weathered Wood, Tumbled Glass and Broken China but you can use any combo.
There is definitely a knack to this technique (and one I need a bit more practise at) but the effect looks lovely and works well as a snow or wintery scene. I stamped fir trees over my background using a Lavinia stamp and a mask to create the undulating hillside.
Simple but effective. If you've not tried this technique why not give it a try.
Thanks for stopping by. Happy crafting.
Carol. xx
Translate
Showing posts with label Index Cards. Show all posts
Sunday, 14 October 2018
Saturday, 29 September 2018
PO ICAD: Beautiful Blooms
Hi everyone,
I think I need to give a huge apology for not having posted for a month! I actually didn't think it had been that long. Lawd, how time flies.
I've still been crafting away doing my France Papillon weekly challenge art journal spreads and also my own personal PO ICAD challenge, although I have to admit that now I'm much more active the latter have slowed down. I also took part in at the bi-monthly heART Swap which had Beautiful Blooms as the theme this time. Apart from making three post card swaps I also made an extra one, scaled down to index card size, to include in my PO ICAD collection.
These are my heART swap cards...........
I was totally thrilled at the lovely comments I received for these very simple cards, although I did feel a cheat because they were so simple. I was asked to share the process I used to create the cards so now you can see just how simple they were to make. It's actually the image which makes these cards.
Firstly I used a plain white piece of 250g card for each card, cut to postcard size. Using Ranger Peeled Paint & Wild Honey Distress Inks I used the wrinkle free technique to create a background. If you're not familiar with this technique there are a million and one videos on YouTube showing how to do it. Basically it entails rubbing ink from the pad onto a craft sheet, spritzing with a little water so the ink separates to form droplets then swooshing or swiping your card through the ink. You can either let the ink blend on the surface of the card and gently manipulate it by tilting the card back and forth or spritz with a little more water and let the water do the job for you..... then heat dry with a heat tool.
Once my background was dry I splatters a few drops of plain water onto the surface, waited a few seconds then dabbed it off with a dry towel. The ink is water reactive even when dry so the effect is to create light splatters across the background. The more water you use, the more splatters.
The final touch on the background was to machine the edges with black thread.
The focal image was a picture from the internet which I printed onto tissue paper, then backed onto more of the same white card with Ranger matt medium glue. The glue helps to blend the tissue paper into the card and also seals the image. Again I machine stitched around the edges of the card.
Finally before mounting the image onto my background I added a layer of torn vellum. Normally I ink the torn edges if I tear vellum but I wanted to keep these cards looking fairly light so left them un-inked this time...... And that's it. Very easy & very simple.
Happy crafting
Carol. xx
I think I need to give a huge apology for not having posted for a month! I actually didn't think it had been that long. Lawd, how time flies.
I've still been crafting away doing my France Papillon weekly challenge art journal spreads and also my own personal PO ICAD challenge, although I have to admit that now I'm much more active the latter have slowed down. I also took part in at the bi-monthly heART Swap which had Beautiful Blooms as the theme this time. Apart from making three post card swaps I also made an extra one, scaled down to index card size, to include in my PO ICAD collection.
These are my heART swap cards...........
I was totally thrilled at the lovely comments I received for these very simple cards, although I did feel a cheat because they were so simple. I was asked to share the process I used to create the cards so now you can see just how simple they were to make. It's actually the image which makes these cards.
Firstly I used a plain white piece of 250g card for each card, cut to postcard size. Using Ranger Peeled Paint & Wild Honey Distress Inks I used the wrinkle free technique to create a background. If you're not familiar with this technique there are a million and one videos on YouTube showing how to do it. Basically it entails rubbing ink from the pad onto a craft sheet, spritzing with a little water so the ink separates to form droplets then swooshing or swiping your card through the ink. You can either let the ink blend on the surface of the card and gently manipulate it by tilting the card back and forth or spritz with a little more water and let the water do the job for you..... then heat dry with a heat tool.
Once my background was dry I splatters a few drops of plain water onto the surface, waited a few seconds then dabbed it off with a dry towel. The ink is water reactive even when dry so the effect is to create light splatters across the background. The more water you use, the more splatters.
The final touch on the background was to machine the edges with black thread.
The focal image was a picture from the internet which I printed onto tissue paper, then backed onto more of the same white card with Ranger matt medium glue. The glue helps to blend the tissue paper into the card and also seals the image. Again I machine stitched around the edges of the card.
Finally before mounting the image onto my background I added a layer of torn vellum. Normally I ink the torn edges if I tear vellum but I wanted to keep these cards looking fairly light so left them un-inked this time...... And that's it. Very easy & very simple.
Happy crafting
Carol. xx
Tuesday, 28 August 2018
PO ICAD: Circulation.
Hi everyone,
are you like me and find it hard to consign some left overs to the bin just in case they come in for another project or because they are just too darn gorgeous?
Today's PO ICAD is one of those pieces.... it was a practise piece from when I was experimenting with alcohol inks on glossy paper. I have to own up that alcohol inks have never been a favourite medium for me and I'm also not a great lover of glossy paper.... I'm a matt kinda gal. That being said it's testament enough to how much I like this background, certainly enough to keep it from being consigned to the bin!
For today's ICAD I wanted to work with watercolours, so I coated the glossy alcohol ink background with some clear gesso. I was delighted with the matt effect it gave in addition to providing some 'tooth' on the paper. Now that was a happy find.
For texture I added opaque crackle texture paste through TCW mini boulders stencil and let it air dry. Next came drippage in the form of Spiced Marmalade Distress Stain and much drying time. Rather than buffing it off the opaque crackle paste I left the stain coating the paste to tone it down from it's original stark white.
Finally, I went around the outside of each circle firstly with a charcoal pencil activated with a little water and then with watercolour pencils.
This was my first outing of TCW mini boulders stencil in my stash and a happy first finding out that I could use clear gesso to give a matt finish to gloss paper whilst also providing enough tooth for it to take water reactive products... yea!!!
Happy crafting,
C xx
are you like me and find it hard to consign some left overs to the bin just in case they come in for another project or because they are just too darn gorgeous?
Today's PO ICAD is one of those pieces.... it was a practise piece from when I was experimenting with alcohol inks on glossy paper. I have to own up that alcohol inks have never been a favourite medium for me and I'm also not a great lover of glossy paper.... I'm a matt kinda gal. That being said it's testament enough to how much I like this background, certainly enough to keep it from being consigned to the bin!
For today's ICAD I wanted to work with watercolours, so I coated the glossy alcohol ink background with some clear gesso. I was delighted with the matt effect it gave in addition to providing some 'tooth' on the paper. Now that was a happy find.
For texture I added opaque crackle texture paste through TCW mini boulders stencil and let it air dry. Next came drippage in the form of Spiced Marmalade Distress Stain and much drying time. Rather than buffing it off the opaque crackle paste I left the stain coating the paste to tone it down from it's original stark white.
Finally, I went around the outside of each circle firstly with a charcoal pencil activated with a little water and then with watercolour pencils.
This was my first outing of TCW mini boulders stencil in my stash and a happy first finding out that I could use clear gesso to give a matt finish to gloss paper whilst also providing enough tooth for it to take water reactive products... yea!!!
Happy crafting,
C xx
Monday, 27 August 2018
PO ICAD: Foiled Again
Hi everyone,
I've called today's ICAD foiled again because it's the second card I made today using Ranger Vintage foil sheets. The first one was going really well, that is, until I decided to add just a tad more foil and it became an unmitigated disaster!
But in the spirit of positivity I'll revise my language. That earlier card was a practise piece and this card.......
is my PO ICAD for today.... (Smile)
When I made my Burghley PO ICAD the background was created on a piece of card much larger than a basic index card, so I cut it down to size. This meant that I had enough left over to use as my background for today's ICAD.
Tim Holtz has a video on YouTube where he uses Ranger Sticky Embossing powder with Ranger Vintage foil sheets. Whilst I have the foil sheets I don't have the sticky embossing powder. But what I do have is a tub of Stampendous Stamp & Bond from eons ago when I use to play with flock powder. I dug it out this morning to give it a try and guess what? It worked perfectly.... basically it's the same stuff.
So using a Woodware grasses stamp I embossed my image using embossing ink, sprinkled with Stamp & Bond, blasted with a heat gun and swiped over my foil sheet ("ugly side down" as Tim says).
For the edges I replaced the embossing ink with Distress Ink (stormy sky) then sprinkled the Stamp & Bond and that worked perfectly too. I tend to forget that Distress ink has a 'window' before it dries which means it can double as embossing ink too.
For the card edge I used a couple of foil sheets in different colours... a warm gentle rose gold and deeper coppery tone. They work beautifully together. I really liked the effect.
As a final touch, I went round my flower adding a little shadow with a Faber Castell Artist Big Brush Pitt marker in warm grey. I also used it around the outside edges. I applied it more extensively at the bottom of the card to draw the eye down and accentuate the foiling in the two bottom corners.
I like this new technique and can see it being used on my journal pages in the future..... I'm learning so much with this PO ICAD challenge. It's great (smile)
Happy crafting
C xx
I've called today's ICAD foiled again because it's the second card I made today using Ranger Vintage foil sheets. The first one was going really well, that is, until I decided to add just a tad more foil and it became an unmitigated disaster!
But in the spirit of positivity I'll revise my language. That earlier card was a practise piece and this card.......
is my PO ICAD for today.... (Smile)
When I made my Burghley PO ICAD the background was created on a piece of card much larger than a basic index card, so I cut it down to size. This meant that I had enough left over to use as my background for today's ICAD.
Tim Holtz has a video on YouTube where he uses Ranger Sticky Embossing powder with Ranger Vintage foil sheets. Whilst I have the foil sheets I don't have the sticky embossing powder. But what I do have is a tub of Stampendous Stamp & Bond from eons ago when I use to play with flock powder. I dug it out this morning to give it a try and guess what? It worked perfectly.... basically it's the same stuff.
So using a Woodware grasses stamp I embossed my image using embossing ink, sprinkled with Stamp & Bond, blasted with a heat gun and swiped over my foil sheet ("ugly side down" as Tim says).
For the edges I replaced the embossing ink with Distress Ink (stormy sky) then sprinkled the Stamp & Bond and that worked perfectly too. I tend to forget that Distress ink has a 'window' before it dries which means it can double as embossing ink too.
For the card edge I used a couple of foil sheets in different colours... a warm gentle rose gold and deeper coppery tone. They work beautifully together. I really liked the effect.
As a final touch, I went round my flower adding a little shadow with a Faber Castell Artist Big Brush Pitt marker in warm grey. I also used it around the outside edges. I applied it more extensively at the bottom of the card to draw the eye down and accentuate the foiling in the two bottom corners.
I like this new technique and can see it being used on my journal pages in the future..... I'm learning so much with this PO ICAD challenge. It's great (smile)
Happy crafting
C xx
Sunday, 26 August 2018
PO ICAD: Into the forest I go.....
Hi everyone,
I love, love, love today's PO ICAD. Just take a look .....
And it really does show that sometimes things don't have to be perfect to be loved. You'll see what I mean in a moment.
If you read yesterday's post, you'll know that I had a puddle of ink left over on my craft sheet from yesterday's PO ICAD: Distress Glaze resist. Not wanting to waste it, I mopped it up on another index card in readiness for today and having enjoyed using the Distress Glaze so much, I wanted to try it through another Ranger Mini Layering Stencil (set 21).
This time I went in a little more heavy handed with the glaze. Actually too much so, because when I took the stencil off my background I could clearly see it was too thick. This left me with a dilemma; do nothing and see if it would work or wipe the Distress Glaze off and risk smudging the outline I'd created by applying it through the stencil.
Coffee always helps the thought processes ( well, it does for me!) so I headed off to make a coffee and ponder. By the time I returned, coffee in hand, I'd decided to do nothing and see what happened.
Ideally I would have created my trees with some Pickeet Fence Distress Stain applied through the stencil. But as I'd run out of that a while ago I reached for the next best thing, Dylusions White Linen spray. It gave me the effect I wanted for the trees but 'snow' on the Distress Glaze. This wasn't quite what I had in mind. I wanted the vibrancy of the coloured background to show through the now muted trees. I certainly hadn't intended the wintery scene I had accidentally created.
Trying to wipe the spray off the background with a damp baby wipe, how ever gently done, would only reactivated the spray and 'chalk' the background and whilst this wasn't an unpleasing effect it still wasn't what I had in mind. So I decided to leave it alone and have the illusion of snow falling between my trees. Not perfect but I was happy with it.
My sentiment is a favourite quote of mine that I computer generated and coloured with Fossilised Amber and Peeled Paint Distress inks. Adding a few water splatters here and there to mimic the snow.
The more I look at this PO ICAD the more I like it...... hope you do too.
Happy crafting
C xx
I love, love, love today's PO ICAD. Just take a look .....
And it really does show that sometimes things don't have to be perfect to be loved. You'll see what I mean in a moment.
If you read yesterday's post, you'll know that I had a puddle of ink left over on my craft sheet from yesterday's PO ICAD: Distress Glaze resist. Not wanting to waste it, I mopped it up on another index card in readiness for today and having enjoyed using the Distress Glaze so much, I wanted to try it through another Ranger Mini Layering Stencil (set 21).
This time I went in a little more heavy handed with the glaze. Actually too much so, because when I took the stencil off my background I could clearly see it was too thick. This left me with a dilemma; do nothing and see if it would work or wipe the Distress Glaze off and risk smudging the outline I'd created by applying it through the stencil.
Coffee always helps the thought processes ( well, it does for me!) so I headed off to make a coffee and ponder. By the time I returned, coffee in hand, I'd decided to do nothing and see what happened.
Ideally I would have created my trees with some Pickeet Fence Distress Stain applied through the stencil. But as I'd run out of that a while ago I reached for the next best thing, Dylusions White Linen spray. It gave me the effect I wanted for the trees but 'snow' on the Distress Glaze. This wasn't quite what I had in mind. I wanted the vibrancy of the coloured background to show through the now muted trees. I certainly hadn't intended the wintery scene I had accidentally created.
Trying to wipe the spray off the background with a damp baby wipe, how ever gently done, would only reactivated the spray and 'chalk' the background and whilst this wasn't an unpleasing effect it still wasn't what I had in mind. So I decided to leave it alone and have the illusion of snow falling between my trees. Not perfect but I was happy with it.
My sentiment is a favourite quote of mine that I computer generated and coloured with Fossilised Amber and Peeled Paint Distress inks. Adding a few water splatters here and there to mimic the snow.
The more I look at this PO ICAD the more I like it...... hope you do too.
Happy crafting
C xx
Saturday, 25 August 2018
PO ICAD: Distress Glaze Resist
Hi everyone,
I wanted to try out using Distress Glaze as a resist technique today. It's a product I've had for sometime but not really used (think there is a theme here....Hmmm!).
I set up my background using Fossilised Amber Distress Oxide (a favour go-to colour for me) through one of the mini layering stencils and then 'bumped' the stencil to one side and slightly down, revealing a small edge of the white, before applying the glaze very lightly with my index finger.
Then using the wrinkle free technique with Peeled Paint, Rusty Hinge, Dusty Concord Distress Ink and Forest Moss Distress Stain as my background colours, I swooshed the index card through the puddle of inks...... gorgeous.
This is not a colour combo I've used before but I loved the effect.....
Because the stencil is quite small and intricate and I was anxious not to use too much glaze it didn't work too well all over the card but has in places here and there. I also got a bit carried away with spritzing water to my puddles of colour towards the bottom of the card which left some watermarks when I blasted it with the heat gun..... I'm ok with that, as it all adds to the effect.
Out came the Stampers Anonymous Bird Crazy stamp for a focal point. This wee chap was stamped on my background in Archival Potting Soil and then again on a scrap piece of card. He was coloured using some of the ink that was left over on my craft sheet. So too was the Snarky Work sticker that I chose for my sentiment (cheeky, isn't it.)
I added a touch of Glossy Accents to his eyes and edged the card with Faber Castell Artist Big Brush Pitt marker in cold grey.
Hmmmm, now what to do with that left over ink on my craft sheet?
Happy crafting,
C xx
I wanted to try out using Distress Glaze as a resist technique today. It's a product I've had for sometime but not really used (think there is a theme here....Hmmm!).
I set up my background using Fossilised Amber Distress Oxide (a favour go-to colour for me) through one of the mini layering stencils and then 'bumped' the stencil to one side and slightly down, revealing a small edge of the white, before applying the glaze very lightly with my index finger.
Then using the wrinkle free technique with Peeled Paint, Rusty Hinge, Dusty Concord Distress Ink and Forest Moss Distress Stain as my background colours, I swooshed the index card through the puddle of inks...... gorgeous.
This is not a colour combo I've used before but I loved the effect.....
Because the stencil is quite small and intricate and I was anxious not to use too much glaze it didn't work too well all over the card but has in places here and there. I also got a bit carried away with spritzing water to my puddles of colour towards the bottom of the card which left some watermarks when I blasted it with the heat gun..... I'm ok with that, as it all adds to the effect.
Out came the Stampers Anonymous Bird Crazy stamp for a focal point. This wee chap was stamped on my background in Archival Potting Soil and then again on a scrap piece of card. He was coloured using some of the ink that was left over on my craft sheet. So too was the Snarky Work sticker that I chose for my sentiment (cheeky, isn't it.)
I added a touch of Glossy Accents to his eyes and edged the card with Faber Castell Artist Big Brush Pitt marker in cold grey.
Hmmmm, now what to do with that left over ink on my craft sheet?
Happy crafting,
C xx
Thursday, 23 August 2018
PO ICAD: No 3
Hi everyone,
I wasn't quite sure what I was going to try today for my PO ICAD but I did want to try doing some intuitive work and to see where it took me...... doesn't sound hard, does it? It might not be for you but I find it really difficult.
Here is today's index card........
I randomly stamped four circles, coloured these using my Intense Ink Blocks and then set too adding Remnat Rubs and Pebeo silver leaf to my hearts content. I think I got a little carried away with the Pebeo but you live and learn.
Happy crafting
C xx
I wasn't quite sure what I was going to try today for my PO ICAD but I did want to try doing some intuitive work and to see where it took me...... doesn't sound hard, does it? It might not be for you but I find it really difficult.
Here is today's index card........
I randomly stamped four circles, coloured these using my Intense Ink Blocks and then set too adding Remnat Rubs and Pebeo silver leaf to my hearts content. I think I got a little carried away with the Pebeo but you live and learn.
Happy crafting
C xx
Wednesday, 22 August 2018
PO ICAD: Let Go
Hi everyone,
today saw me trying out using watercolours on vintage book pages... Hmm not too successful. I didn't prime my first attempt, so when I came to add water the book page just soaked up the water like a sponge and my watercolours bleed badly.
So if nothing else this PO ICAD exercise is teaching me thing en route.
You might have seen this done as journal page on the internet (sorry I'm not sure who created it originally) but I've always liked it for it's simplicity so when I wanted a quite index card to day this is the one I thought I'd recreate.
Having learnt my lesson and made sure that after gluing my book page to my index card, that I gave it a good coat of clear gesso before I started drawing and adding colour.
I used a black micron pen to draw my images and border and Stamping Up water colour markers for the colouring. The outside border was done using a Faber Castell Artist Pitt Big Brush marker and a little water to create a grey wash. Glossy Accents gave me a bright shiny balloon.
Happy crafting
C. xx
today saw me trying out using watercolours on vintage book pages... Hmm not too successful. I didn't prime my first attempt, so when I came to add water the book page just soaked up the water like a sponge and my watercolours bleed badly.
So if nothing else this PO ICAD exercise is teaching me thing en route.
You might have seen this done as journal page on the internet (sorry I'm not sure who created it originally) but I've always liked it for it's simplicity so when I wanted a quite index card to day this is the one I thought I'd recreate.
Having learnt my lesson and made sure that after gluing my book page to my index card, that I gave it a good coat of clear gesso before I started drawing and adding colour.
I used a black micron pen to draw my images and border and Stamping Up water colour markers for the colouring. The outside border was done using a Faber Castell Artist Pitt Big Brush marker and a little water to create a grey wash. Glossy Accents gave me a bright shiny balloon.
Happy crafting
C. xx
Sunday, 19 August 2018
Day 17. Burghley PO ICAD
Hi everyone,
I thought all was going swimmingly well on the recuperation front and I had planned to have a day out at the Burghley Horse Trials in a months time as a reward. But rather disappointingly my post op consultation this morning has put the kibosh on that. It appears that I've been doing way too much, way too soon and not resting enough....... short of getting up and breathing that's all I'm allowed to do this month! And there was I thinking I'd be exceptionally good and a nice stroll around the horse trials would be fine...Hmmm!
So much to my dismay Burghley is out for this year. As much as I'm gutted there is always next year to look forward to.
I commiserated by making this PO ICAD. This gorgeous little stencil looks like those beautifully elegant riders that do dressage and my something new was using it today for it's first outing.
I used the stencil to create a mask (there's no holding me back with making and using masks now) which I then used on my background as I white heat embossed the ledger text from the Stampers Anonymous Etectera stampset.
To provide colour for the background I blended Bundled Sage and Iced Spruce Distress Oxide (love this colour combination) and then added a few water splatters. The white embossing acted as a resist to the DO.
When the mask was removed it left a white space which I then coloured through the stencil with Black Soot Distress Ink, working the colour in with a small finger dauber.
Finally I used Ranger Idea-ology mini alphabet letters to create the name and outlined these with a fine black Micron pen.
Have to say I'm really delighted how this index card turned out. Using heat embossing as a resist is a pleasing technique as it never seems to go wrong and who couldn't like this colour combo (smile).
Happy crafting,
C. xx
I thought all was going swimmingly well on the recuperation front and I had planned to have a day out at the Burghley Horse Trials in a months time as a reward. But rather disappointingly my post op consultation this morning has put the kibosh on that. It appears that I've been doing way too much, way too soon and not resting enough....... short of getting up and breathing that's all I'm allowed to do this month! And there was I thinking I'd be exceptionally good and a nice stroll around the horse trials would be fine...Hmmm!
So much to my dismay Burghley is out for this year. As much as I'm gutted there is always next year to look forward to.
I commiserated by making this PO ICAD. This gorgeous little stencil looks like those beautifully elegant riders that do dressage and my something new was using it today for it's first outing.
I used the stencil to create a mask (there's no holding me back with making and using masks now) which I then used on my background as I white heat embossed the ledger text from the Stampers Anonymous Etectera stampset.
To provide colour for the background I blended Bundled Sage and Iced Spruce Distress Oxide (love this colour combination) and then added a few water splatters. The white embossing acted as a resist to the DO.
When the mask was removed it left a white space which I then coloured through the stencil with Black Soot Distress Ink, working the colour in with a small finger dauber.
Finally I used Ranger Idea-ology mini alphabet letters to create the name and outlined these with a fine black Micron pen.
Have to say I'm really delighted how this index card turned out. Using heat embossing as a resist is a pleasing technique as it never seems to go wrong and who couldn't like this colour combo (smile).
Happy crafting,
C. xx
Saturday, 18 August 2018
Day 16 - Scatty Cat PO. ICAD
here is today's PO ICAD.......
I blended Rusty Hinge, Fired Brick and Fossilised Amber Distress Oxides for my background and then the usual splatters of water for interest.
I think everyone will recognise the Stampers Anonymous Crazy Cat stampset. I've had this set for ages now and, I'm ashamed to say, not used it.
Using my Misty I stamped out one of the cat images directly onto the background in black Archival ink and then another image onto some scrap white card which I then coloured using my Stamping Up watercolour marker pens.
My index cards are becoming rather bulky so I glued my now coloured cat onto the background rather than use dimensional foam pads. Using a Faber Castell Artist Big Brush Pitt pen in cold grey, I created some ground for him to sit on and a little shadow outlining to give him a little depth.
The final touch was Glossy Accents for the eyes and today's index card was done. Simple but I hope you liked him.
Happy Crafting
C. xx
Thursday, 16 August 2018
PO Index Card Challenge
Hi everyone,
I found out recently that I would need an operation and that post op, I'd be fairly incapacitated for at least three months, perhaps as long as six.....groan.
But whilst life sends little challenges there are always silver linings, if you look for them and true to form, my news had one tucked away. Although I'd be incapacitated, effectively housebound and band from any heavy lifting or stretching (housework was definitely out for at least 6 weeks... yea!) I would still be able to craft. In fact it was being actually encouraged.... Now that is one silver lining.
So despite the relatively short notice I had enough time to plan what crafting projects I could do post-op, whilst recuperating and I set to making a list. I only recently found out about the official annual ICAD Challenge and knew that my impending hospitalisation meant I couldn't join this year's ICAD. I certainly didn't consider that one of my post-op crafting activities could be my own personal ICAD Challenge.... that was down to my partner.
As much as I adore flowers my gorgeous partner realised I might be over run with them once I was out of hospital, so instead greeted my home coming with an AMAZING goodie box packed to the gills with crafting bits & bobs. How wonderful was that!!! A crafter's dream.
In amongst the goodies was a ring-bound pack of 100 index cards which set my mind spinning. Why not do my own personal post - op ICAD challenge? So that's what I've been doing.........
I've been at it for a couple of weeks now or 15 days to be precise and I now have 15 PO ICAD's to share with you. What I decided to do, in addition to creating an index card a day, was to try something new. By something new, I mean a new technique or a stamp that I'd bought but not used or perhaps one in a set that I haven't tried... that kind of thing.
Ok, here we go:
Day 1:
For this ICAD I tried a new technique; masking off lines with masking tape and then watercoloring between them. When I removed the masking tape there was some seepage underneath, which I was cool with, I simply journalled in those areas.
Day 2:
Another new technique. I wanted to try out a faux encaustic technique using Seth Apter's texture bake embossing powders (vintage beeswax & patina oxide) and also stamping into the melted embossing powder.
I was really pleased at how this little ICAD turned out, especially my little bee which I stamped onto a piece of used teabag.
Day 3:
I've been wanting to try weaving with book pages for ages now, so that was my challenge for today. It actually took me longer to cut my book page into even strips than it did to weave them together but it was fun all the same.
I added a touch of heavy gesso to bring the focus to the centre, where I added a circle of silver jewellery wire and a little homemade heart I found in amongst my stash.
Day 5:
A simple collage made up of stamped muslin on inked edged vellum, a postage stamp on a scrap of parchment and embroidery on a book page mounted onto a scrap of gorgeous coloured silk from my embroidery stash...... very simple but I love this one.
A wee close up of the embroidery and the lovely arched door stamp I found.
Day 6. Live Gently Upon this Earth ICAD
This ICAD is basically a used window envelope with a little washi collaging and Ranger Small Talk stickers. The seed head was collected on my now daily walks to build up my strength and fitness again. As I wandered along the footpath near home today, I noticed how the summer flowers are now blown and forming seedpods, which have their own beauty.
My something new was using the old window envelope instead of throwing it into the recycling.
Day 8. Do More Than Exist ICAD
I found out recently that I would need an operation and that post op, I'd be fairly incapacitated for at least three months, perhaps as long as six.....groan.
But whilst life sends little challenges there are always silver linings, if you look for them and true to form, my news had one tucked away. Although I'd be incapacitated, effectively housebound and band from any heavy lifting or stretching (housework was definitely out for at least 6 weeks... yea!) I would still be able to craft. In fact it was being actually encouraged.... Now that is one silver lining.
So despite the relatively short notice I had enough time to plan what crafting projects I could do post-op, whilst recuperating and I set to making a list. I only recently found out about the official annual ICAD Challenge and knew that my impending hospitalisation meant I couldn't join this year's ICAD. I certainly didn't consider that one of my post-op crafting activities could be my own personal ICAD Challenge.... that was down to my partner.
As much as I adore flowers my gorgeous partner realised I might be over run with them once I was out of hospital, so instead greeted my home coming with an AMAZING goodie box packed to the gills with crafting bits & bobs. How wonderful was that!!! A crafter's dream.
In amongst the goodies was a ring-bound pack of 100 index cards which set my mind spinning. Why not do my own personal post - op ICAD challenge? So that's what I've been doing.........
I've been at it for a couple of weeks now or 15 days to be precise and I now have 15 PO ICAD's to share with you. What I decided to do, in addition to creating an index card a day, was to try something new. By something new, I mean a new technique or a stamp that I'd bought but not used or perhaps one in a set that I haven't tried... that kind of thing.
Ok, here we go:
Day 1:
For this ICAD I tried a new technique; masking off lines with masking tape and then watercoloring between them. When I removed the masking tape there was some seepage underneath, which I was cool with, I simply journalled in those areas.
Day 2:
Another new technique. I wanted to try out a faux encaustic technique using Seth Apter's texture bake embossing powders (vintage beeswax & patina oxide) and also stamping into the melted embossing powder.
I was really pleased at how this little ICAD turned out, especially my little bee which I stamped onto a piece of used teabag.
Day 3:
I absolutely love this ICAD....... Apart from messing about with paint, paper, inks etc my other passion is embroidery and gorgeous threads and fabrics. I don't embroider nearly enough these days but that being said, my silks and threads are never far away.
Today I had the over whelming urge to use this scrap of lace and to have a lazy afternoon reminding myself how to do French Knots..... it's a bit like riding a bike, I found. You never forget. Whilst I machine stitch in my mixed media work all the time, I don't do any hand stitchery. So that was my something new for this ICAD
I added a few Mother of Pearl fragments and a moth image.... I had originally planned to use a gorgeous butterfly I found moribund on the carpet the other morning but it was too fragile.
Day 4: For the love of books ICAD
I've been wanting to try weaving with book pages for ages now, so that was my challenge for today. It actually took me longer to cut my book page into even strips than it did to weave them together but it was fun all the same.
I added a touch of heavy gesso to bring the focus to the centre, where I added a circle of silver jewellery wire and a little homemade heart I found in amongst my stash.
Day 5:
A simple collage made up of stamped muslin on inked edged vellum, a postage stamp on a scrap of parchment and embroidery on a book page mounted onto a scrap of gorgeous coloured silk from my embroidery stash...... very simple but I love this one.
A wee close up of the embroidery and the lovely arched door stamp I found.
Day 6. Live Gently Upon this Earth ICAD
Believe it or not this was another technique that I hadn't tried, stamping onto a book page. The text is from a Chinese book on Buddism which I thought sat well with the delicate maidenhair fern stamp and the sentiment I wanted to use.
I stamped and then heat embossed the fern before colouring it, using Stamping Up watercolour marker pens and a water brush.
Day 7. Choose to see, everything has beauty ICAD
This ICAD is basically a used window envelope with a little washi collaging and Ranger Small Talk stickers. The seed head was collected on my now daily walks to build up my strength and fitness again. As I wandered along the footpath near home today, I noticed how the summer flowers are now blown and forming seedpods, which have their own beauty.
My something new was using the old window envelope instead of throwing it into the recycling.
Day 8. Do More Than Exist ICAD
Attempting a galaxy sky with Distress Ink & Oxides has been on my to do list for sometime, so today was the day. Plus I wanted to try out a brand new stamps, Altenew's 'To the Moon " stampset.
I think I got a bit carried away with my water & Radiant Rain Shimmer Mist (solar gold) splatters. But I absolutely loved the end result after using the three moon stamps that are in the set to create my moon.
I heat embossed the last moon stamp with clear embossing powder. There were tiny flecks of iridescence left in the powder from the last time I used it, which transferred onto my moon..... definitely a happy accident because the end result, a hint of shimmer, looked amazing.
Day 9. Random Doodles ICAD
I wanted to play with applying paint through some of my stencils and some random marking, with the idea of creating a background that I would eventually paint over, leaving the background peeking through in places. That was the idea. The reality was something different.
The picture above is the background I created..... Hmmmm, I wasn't happy but pressed on.
And this was the background after I'd painted over it and added random doodles....... I hated it and it was consigned to the bin tout de suite! At least I tried it.
To meet my challenge of creating an ICAD a day, I resorted to quick, tried and tested doodling with a black Bic biro, a touch of highlighting with a Faber Castle Pitt brush marker pen and some Glossy Accents for good measure.
Day 10. No. 79 ICAD
Another ICAD I'm pleased with.
I used masking tape, washi and torn book pages to create a background then a colour wash using Payne's Grey and a hint of Burnt Umber watercolour paint. My edges were highlighted with a charcoal pencil before adding gesso, scraped across the page with a pallet knife.
A scrap of ivory vintage lace and a Ranger mini plaquette completed the page together with machine stitchery in black.
Day 11: Home Rusted ICAD
I did some home rusting some time ago and the happy accident was the awesome markings left on the fabric that I used. You'll have seen it in an earlier post, as I used a piece on one of my ALAD/ASAW challenge pieces. It is without doubt gorgeous.
I couldn't resist using it for today's ICAD but I wanted to accentuate the soft pastel grey and beige of the fabric with some bright orange embroidery.
I machine stitched my embroidered piece to the index card but first covered it with a used teabag which just happened to be the perfect shade of subtle beige
Day 12: Circulation ICAD
Don't ask me why this ICAD is called Circulation because I have absolutely no idea..... it just came to me.
Whilst I've stamped on fabric before I've not stamped onto rough silk so that's what I tried today.... and it worked pretty well.
I decided to added a small tag to my card, so that was edged with Ranger Botanical washi, stamped with an Entomology bug which I coloured and then coated the carapace with glossy accents. A few Ranger Remnant Rubs were added to finish it off.
A few more Remnant Rubs were added to the silk (that works well too) along with a couple of feathers left for me by Ester (one of my small bantam flock) after she waddled through to visit me in the craft room (it's a regular occurrence in the summer when the doors are open!)
Day 13: Hint of Brush ICAD
I decided to play with Brusho today. I outlined the images left after spritzing with water with a Faber Castelle fine line pen and an a scrape that wasn't outline for my sentiment layer.
Day 14: Loose Threads ICAD
The jury is definitely out on this ICAD. I liked the technique that I'd seen on YouTube but not the end result. I pre-gessoed the card and adhered the thread with more gesso for texture. I think using the gesso with the Distress Stain I chose to colour the card was my mistake because it took forever to dry! Definitely a another try is in order but this time without using gesso.
In an attempt to add a little more interest I added mini art stone with some heavy matt gel.... Hmmm, still doesn't work for me!
Day 15: Art ICAD
For my background I decided to use a scrap of card that had formally been a Distress Oxide practice piece. For texture I used Dreamweaver stencil paste through a honeycomb stencil, a few pieces of torn vintage book page and then some stamping using Archival ink.
Next came a shop full of Ranger: Oodles and oodles of Ranger Remnant Rubs, a piece of film strip, a story band, typewriter keys and wooden letters, painted black.
And there you have it, my PO ICAD to date. It's been fun but I still have a long way to go to meet my challenge. Just hope my creative muse will last out.
From here on in I'll try to post my daily ICAD each day or every couple of days at least, so please stop by.
Happy Crafting
Carol. xx
Subscribe to:
Posts (Atom)