I'll warn you now that this is a photo heavy post, so grab a seat and your favourite cuppa and enjoy....... actually it isn't as photo heavy as I planned because for some reason I couldn't get some of my photos to re-orient themselves...dooooough!!!
I was lucky enough to share one of Jim's workshops to make this STUNNING Archivist Journal at AFTH in Harrogate recently. Isn't it amazing!
 |
| Yes, that's a little tin on the front. |
 |
| My album turned out a little more chunky than the original as I added a few extra inclusions. |
were excellent quality, the written instructions were explicitly detailed and there were oodles of goodies left over.... definitely value for money. The whole day was fantastic.... I can't enthuse about it enough.
My only regret was that I hadn't booked on to the other three workshops that Jim was doing that weekend.
Here are a few pics of my finished album...
 |
This is the opened journal; pages on the left secured in place with a ribbon and a pocket in the back inside cover
|
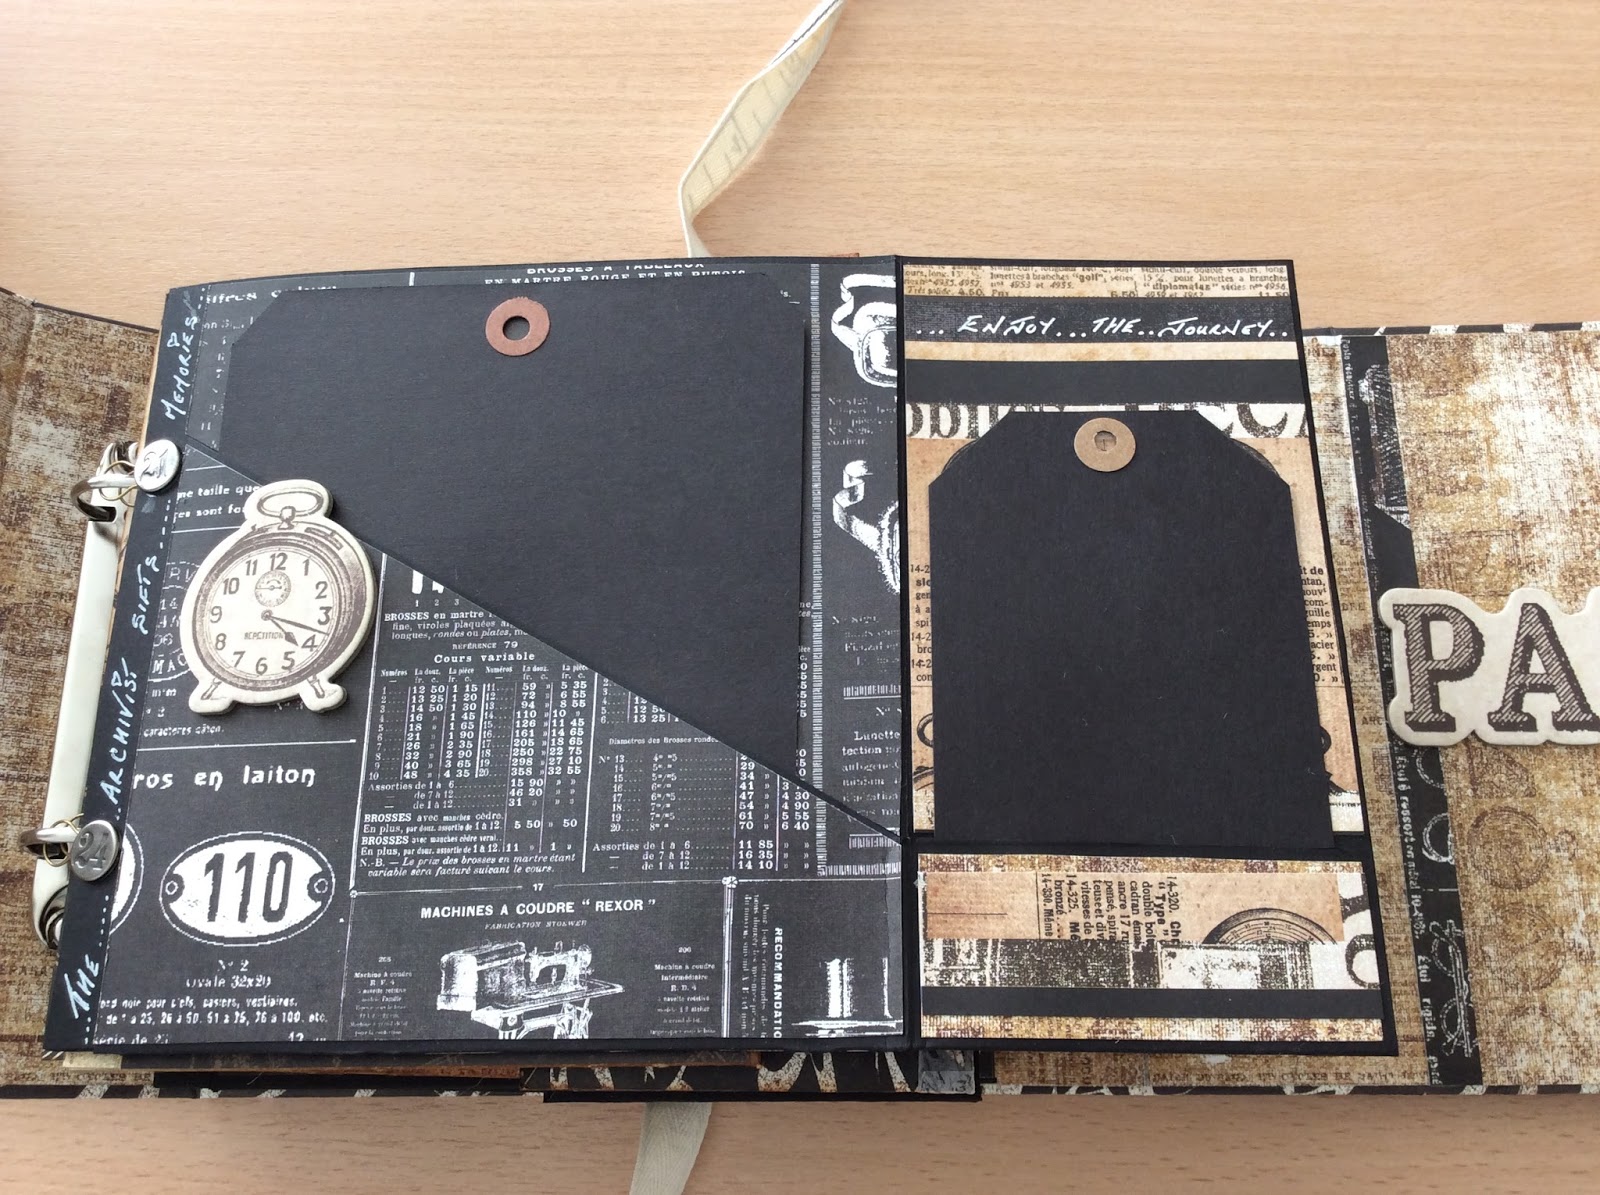
The first page opened out.... couple of plain black tags in pockets.... touch of white Stigno pen writing in the margin.

This is the back of the first page opened out. One huge pocket and tag on the main back. Over the main pocket there is another couple of flaps, the first of which I embellished with a SU die cut layered with a Ranger tag label and ring fastener.
The LHS flap has a vertical pocket in which I tucked a plain black journalling tag and a little flip open booklet. Peaking out from behind is a Ranger word band.

The back of this page has a simple horizontal pocket at the bottom with a black journalling tag.
Jim did a very ingenious, nifty ring binding system using garment pins and brads. I decided to cover the plain brads with Ranger number brads. I cut off the metal spikes at the back and secured them in place with a little Glossy Accents.


Jim alternated his tags between Ranger manilla and black tags, the pages in the journal too but I decided I liked the look of black tags that I used them throughout.


These are what goes inside those pockets.... a wee salary envelope with a magnatised Ranger metal word tag and a wee plain black journalling tag. I'll probably be doodling on my pockets a tittle when I come to journal on my tag


I added just a plain black envelope which I layered with another chipboard piece on the flap and more of the paper on the inside and outside lower section.

This is the other section of the inside back of the journal. I added a black vertical pocket (Why? Just because I could...lol) which I layered up with more of the paper and the huge chipboard Paris piece.

As you can see just a very simple booklet with comic binding and lots of pocket and flaps to write on. I really love the look of white ink on black paper and this paper is just beautiful without any emblishment.
Here's just a very quick flip through the pages.......


So there you have it..... The only thing left for me to say is thank you Jim for such a fun day. If you haven't found Jim's website yet, you're in for a real treat.
Happy crafting and thank you for stopping by,
Carol. x
No comments:
Post a Comment